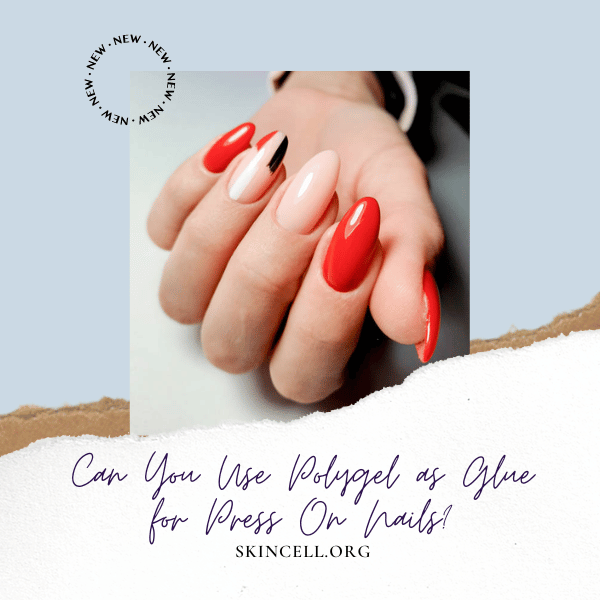
Can You Use Polygel as Glue for Press On Nails?
Wondering if polygel can double as your go-to adhesive for press-on nails?
With the nail art world constantly evolving, it’s no surprise that innovative uses for popular products like polygel are popping up. Known for its strength and versatility in nail enhancement, polygel might just be the answer for those seeking a durable bond for their press-on nails.
But is it really a viable alternative to traditional nail glues?
In this exploration, we delve into the composition and application of polygel, comparing it to standard adhesives, to uncover if it can truly hold up as a glue for press-on nails. From the hybrid technology behind polygel to practical tips for application and aftercare, we’ll cover all you need to know about this unconventional use.
- Curious about how polygel stacks up against traditional glues?
- Wondering about the application process and how it differs?
- Looking for aftercare tips to ensure longevity?
Let’s dive in.
Key Takeaways
- Polygel is a hybrid nail enhancement system that is not designed to be used as a nail glue.
- Prepping your natural nails is an important step before applying polygel.
- Safe removal of polygel nails is essential to avoid damaging your natural nails.
Understanding Polygel
Polygel is a type of nail enhancement that is becoming increasingly popular among nail enthusiasts. It is a hybrid of gel and acrylic, combining the best properties of both materials.
In this section, we will explore the composition and properties of Polygel and compare it with other types of nail enhancements.
Composition and Properties
Polygel is made up of a combination of oligomers, polymers, and monomers. It has a unique formula that allows it to be molded and shaped like acrylic, but it also has the flexibility and durability of gel.
Polygel is applied using a brush, just like acrylic, but it does not require a monomer to activate it. Instead, it is cured under a UV lamp like gel.
Polygel is known for its strength and flexibility. It is less likely to break or chip compared to traditional acrylics. It is also more lightweight and comfortable to wear than acrylics. Additionally, Polygel can be easily removed without damaging the natural nail.
Polygel vs. Acrylics and Gels
Polygel is a relatively new product in the nail enhancement market, so it is important to understand how it compares to other types of nail enhancements.
Acrylics are known for their durability and strength, but they can be heavy and uncomfortable to wear. Gels, on the other hand, are lightweight and flexible, but they are not as durable as acrylics.
Polygel offers the best of both worlds. It is lightweight and flexible like gel, but it is also strong and durable like acrylics. Additionally, Polygel does not have a strong odor like acrylics and does not require as much filing as gels.
One popular brand of Polygel is the Gelish Polygel brand nail enhancement French kit. This kit includes everything you need to create a French manicure using Polygel. The kit includes a brush, Polygel, and a UV lamp for curing.
In summary, Polygel is a new and innovative type of nail enhancement that offers the best of both gel and acrylics. It is strong, lightweight, and flexible, making it a popular choice among nail enthusiasts.
Prepping Natural Nails for Polygel
Polygel is a popular nail enhancement technique that can be used to create beautiful and long-lasting nails. However, before applying polygel, it is important to prep your nails properly. In this section, we will discuss the steps involved in prepping natural nails for polygel.
Cleaning and Buffing
The first step in prepping your nails for polygel is to clean and buff them. Use a nail polish remover to remove any old polish or oils from your nails.
Then, use a nail buffer to gently buff the surface of your nails. Buffing helps to remove any dead skin cells and rough edges, creating a smooth surface for the polygel to adhere to.
Applying Primer and Base Coat
After cleaning and buffing your nails, the next step is to apply a primer and base coat. The primer helps to dehydrate the nail plate and create a better bond between the natural nail and the polygel. Apply the primer to the entire surface of your nails, making sure to cover the edges and tips.
Next, apply a gel base coat to your nails. This will provide a sticky surface for the polygel to adhere to. If you are using a nail form, apply the base coat onto the form as well. Make sure to cure the base coat with a UV lamp before proceeding to the next step.
By following these steps, you can properly prep your nails for polygel application. Remember to use a dehydrator if you have oily nails, and always follow the manufacturer’s instructions for best results.
Application Process for Polygel as Glue
If you’re looking for an alternative to traditional nail glue, you may be wondering if you can use polygel as glue for press-on nails. The answer is yes! Polygel can be used as an adhesive for press-on nails, and it’s actually a great option because it’s stronger and lasts longer than regular nail glue.
Here’s how to apply polygel as glue for press-on nails.
Using Polygel with Dual Forms
Dual forms are a great tool to use when applying polygel as glue for press-on nails. They are reusable plastic forms that are used to create a nail extension. Here’s how to use them:
- Apply a base coat to your natural nails and let it dry.
- Select a dual form that fits your nail size.
- Apply a small amount of polygel to the inside of the dual form.
- Place the dual form onto your natural nail, making sure it’s centered.
- Use a nail brush to spread the polygel evenly inside the dual form.
- Cure the polygel under a UV LED lamp or LED light for the recommended time.
- Remove the dual form and you’ll have a perfect extension to attach your press-on nail.
Attaching Press-On Nails with Polygel
Once you have your extensions made with polygel, you can attach your press-on nails with adhesive tabs or glue. Here’s how to do it:
- Apply a small amount of adhesive tab or glue to the back of your press-on nail.
- Press the press-on nail onto the polygel extension.
- Hold the press-on nail in place for a few seconds until it’s secure.
- Repeat the process for all of your nails.
Polygel is a great option for attaching press-on nails because it’s strong, durable, and lasts longer than traditional nail glue. Just make sure to follow the recommended curing time and use a UV LED lamp or LED light for the best results.
Aftercare and Maintenance
Taking care of your nails after applying polygel is essential to maintain the longevity of the attachments. Here are some tips to help you care for your nails and keep them looking great.
Daily Care Tips
- Avoid using your nails as tools to open cans, packages, or other items. This can damage the polygel and cause it to lift or break.
- Apply a gel top coat to your nails every two to three days to help protect the polygel and keep it looking shiny.
- Keep your nails moisturized by applying cuticle oil or hand lotion regularly. This can help prevent the polygel from drying out and cracking.
- Avoid exposing your nails to harsh chemicals or cleaning agents, as these can damage the polygel and cause it to lift or peel.
- Use warm water instead of hot water when washing your hands or doing dishes. Hot water can cause the polygel to soften and become more prone to damage.
Longevity of Polygel Attachments
Polygel attachments can last up to three weeks with proper care and maintenance. Here are some additional tips to help extend the life of your polygel attachments:
- Avoid picking or biting your nails, as this can damage the polygel and cause it to lift or break.
- If you notice any lifting or separation of the polygel from your natural nail, gently file the area and apply a small amount of polygel to the affected area. This can help prevent further damage and keep the attachment in place.
- If you need to remove your polygel attachments, soak your nails in warm water for a few minutes to soften the polygel. Then gently peel off the attachments from the sides, taking care not to damage your natural nails.
By following these tips, you can help ensure that your polygel attachments last as long as possible and look great. Remember to always take care of your nails and avoid exposing them to harsh chemicals or rough treatment.
Safe Removal of Polygel Nails
If you have Polygel nails, it is important to remove them safely to prevent damage to your natural nails. The removal process requires patience and care to avoid any harm to your nails. Here are some tips to help you safely remove Polygel nails.
Soak-Off Process
The most common method to remove Polygel nails is to use acetone. Acetone is a powerful solvent that breaks down the gel and allows it to be removed easily. Here is a step-by-step guide to the soak-off process:
- Use a nail file to remove the shiny top layer of the Polygel nails.
- Cut a piece of aluminum foil into small squares that are large enough to wrap around each nail.
- Soak small pieces of cotton in acetone and place them on the nails.
- Wrap each nail with aluminum foil to keep the cotton in place.
- Wait for 15-20 minutes to allow the acetone to work.
- Remove the aluminum foil and cotton from each nail.
- Use a cuticle pusher to gently scrape off the softened Polygel from your nails.
Preventing Damage During Removal
It is important to be gentle when removing Polygel nails to avoid any damage to your natural nails. Here are some tips to help you prevent damage during the removal process:
- Do not force the Polygel to come off your nails as it can cause damage to the nail bed.
- If you feel any pain or discomfort during the removal process, stop immediately and seek professional help.
- Use a cuticle oil or nail strengthener after removing the Polygel nails to restore moisture and strength to your natural nails.
By following these tips, you can safely remove Polygel nails without causing any damage to your natural nails.
Frequently Asked Questions
What are the steps for applying press-on nails with polygel?
If you are using polygel as an adhesive for press-on nails, the first step is to ensure your natural nails are clean and dry. Then, apply a thin layer of polygel to your natural nail and place the press-on nail on top. Hold it in place for a few seconds to allow the polygel to set. Repeat this process for all your nails.
Is polygel a suitable substitute for traditional nail glue?
Polygel can be used as an adhesive for press-on nails, but it is not a direct substitute for traditional nail glue. Polygel is a hybrid between acrylic and gel and is used for creating nail extensions. It is flexible and durable, making it an excellent choice for adhering press-on nails.
How does polygel compare to gel glue for press-on nail application?
Polygel is a thicker substance than gel glue, which makes it easier to apply. It also provides a stronger hold and lasts longer than gel glue. However, gel glue is more flexible than polygel, which means it is less likely to crack or break.
Can soft gel be used for adhering press-on nails, similar to polygel?
Soft gel is not recommended for adhering press-on nails. It is a thinner substance than polygel and does not provide the same level of adhesion. Soft gel is typically used as a topcoat for nail polish and is not designed for use as an adhesive.
What are the removal procedures for press-on nails applied with polygel?
To remove press-on nails applied with polygel, soak your nails in acetone for 10-15 minutes. This will soften the polygel, making it easier to remove. Gently scrape off the polygel and press-on nails with a cuticle pusher or nail file.
Are there alternative adhesives for press-on nails if polygel is not available?
Yes, there are several alternative adhesives for press-on nails. Traditional nail glue, double-sided tape, and adhesive tabs are all effective options. However, it is important to note that these adhesives may not provide the same level of hold as polygel.

