Homemade Natural Skin Care Recipes
What if we tell you that it is possible to tackle skincare woes with things that you already have in the house?

Yes, you guessed it right! We are talking about homemade skin care products. Skin is the largest organ of our body and requires care. Youthful and radiant skin doesn’t always come naturally, but needs proper and timely care. And like us, if you are also reluctant to put on cosmetic and synthetic products on the skin, you are at the right place.
Today, in this guide, we will take you through the top seven recipes that you can try at home for glowing and supple skin. All the ingredients we have mentioned are safe to use and won’t leave a dent in your pocket.
So, without any more delay, let’s take a look!
Best Homemade Natural Skin Care Recipes
1. Moisturizing With Coconut Oil
Are you tired of dealing with dry skin, and looking for solutions that would help add a youthful appearance to your skin? Then look no further, as coconut oil is one of the best moisturizers you can try. Coconut oil [1] is a great component to add to your DIY skincare routine. And, we are here to tell you how to put it to best use.
Ingredients List
- Unrefined Coconut oil
- Essential oils
- Carrier oils
When choosing the coconut oil, make sure that you read the label on the packaging carefully. There is a wide variety of coconut oils available on the market, such as virgin, organic, and refined variants. We recommend that you avoid the refined variants as they are highly processed and contain a range of additives that might adversely affect your skin.
Essential and carrier oils are optional, and it is not mandatory to add them to the coconut oil when applying it to your skin. However, if you do decide to mix them, there are a few combinations that you can experiment with, and see which one works the best. Here are two combinations which we prefer:
- Sweet almond oil and lemon oil
- Olive oil, rose oil, and lavender oil
Preparation Method
After you decide to use coconut oil as a moisturizer, you can start making the mix. If you are not planning to use any carrier oil or essential oil, you can simply start by placing the coconut oil jar in hot water so that it melts. Warm water helps the oil melt, so that you can apply it directly to your skin.
If you plan to use other oils with coconut oil, put them all together in a blender. After the blender whips it all into a blend, store it in an air-tight container.
Now that you are ready with the whipped coconut moisturizer, all you need to do is apply it regularly.
2. Try The Bentonite Clay Mask
For people with sensitive skin, it is best that they give the bentonite clay face mask a try. It is one of the best natural skin care products to try, and only requires a few ingredients to make. If you have acne-prone skin, we suggest you try it. There are a number of essential minerals in it that will prove to be very effective for your skin.
Ingredients List
- Powdered bentonite clay
- Apple cider vinegar
- Essential oils
Just like the previous DIY solution, for this one too, the essential oils are optional. However, we strongly suggest you use one or two of your choice to remove the strong aroma of vinegar. The clay itself suppresses the pungent scent of the vinegar, but adding some oils of your choice will do a better job.
Before you add the essential oils to the mix, it is best that you first try mixing it with vinegar to check which essence seems to be the best.
Preparation Method
Once you have all the ingredients ready, it is time to start making the mask. As we have mentioned in the list of ingredients, the bentonite clay should be in powdered form. This will save you the trouble of softening or kneading it. Now, let’s move on to how you can make this facial mask.
To begin with, you need to mix an equal amount of powdered bentonite clay with apple cider vinegar in a bowl. Use a stirrer to ensure that the components are mixed properly. Do not worry if the mixture looks a bit heavy. It is a clay mask and is supposed to be thick.
Now, it is time to add the essential oils of your choice to the mix. If you do not want any overpowering smell, you can even try to use natural oils that will help add some fragrance. We suggest that you do not pour the entire amount at once. Rather, keep adding a few drops at a time.
You can even consider adding carrier oils like jojoba oil or olive oil to the mix. Once you have added everything, it is time to mix them well. And now, you have the clay mask ready. You can prepare this mix for a one-time application or make more and store it in an air-tight container for later use.
Coming to the application, remember that the mask is very thick, and you should handle it accordingly. Apply the mix to your face, and avoid putting it in the eye area. Let the mask sit for around 15 minutes, and then rinse it with lukewarm water.
Not to mention, if you are using this mask for the first time, we suggest keeping the wait time shorter and see how your skin is reacting to it.
3. Honey And Apple Cider Vinegar Mask
Are you looking for DIY skin care recipes that have anti-aging properties and help tackle acne? Then, you have to try the honey [2] and apple cider vinegar mask. There’s baking soda in the mix that helps deal with problems related to oily skin. And, the honey and apple cider vinegar together helps you maintain glowing skin.
Ingredients List
- Apple cider vinegar
- Pure/raw honey
- Baking soda
The first step in preparing this mask is to get all the essential ingredients in one place. We have mentioned the three most important components that go into the making of the mask. However, if you are feeling experimental, you can consider putting other ingredients like lemon juice or essential oils of your choice into the mix.
Also, try to source the honey from a natural health food store. This is to ensure that the honey you are using is raw and not the usual sugar-filled honey that you get in local supermarkets. Honey with additives is not good for your skin.
Preparation Method
It is important to note that apple cider vinegar is very acidic in nature, and we suggest that you keep some water handy to dilute it if needed. Instead of adding it directly to the mix, dilute the apple cider vinegar in a bowl first. After it is done, take another bowl, and add the diluted vinegar to the honey and baking soda.
There is no right proportion of the ingredients to be used. You can add more if you want a thick mixture. However, if you are looking for a runny consistency, you need to tweak the proportions accordingly.
If you mix everything at one go, you will have less control. For the best results, we suggest that you slowly add the vinegar to the honey and baking soda. This way, you can stop whenever you feel the consistency is right. Some people prefer it to be thick and gooey, while there are others who like runny masks.
4. Tea Tree Oil And Aloe Vera Gel
When trying your hands at making homemade skincare products, you must give this recipe a try. To maintain natural beauty, women have been using aloe vera for years. It helps soften the skin and also protects it from sun damage. And along with the tea tree oil [3] , it becomes a potent mix that can help you effectively deal with acne too.
Ingredients List
- Aloe vera gel
- Essential oils
- Tea tree oil
When purchasing a pack of aloe vera gel, ensure that it is 100% natural. Anything added to it will take half the benefits away. You can find pure aloe vera gel from online stores or from stores that sell natural products. Next, you need to find a good pack of tea tree oil and some essential oils of your choice.
It is best to try a few combinations to see what works for your skin and which essence you prefer. Tea tree oil is a great option for people with sensitive or combination skin, as it helps deal with acne. Aloe vera gel, on the other hand, soothes your skin and helps you better tackle skin inflammation as it has anti-inflammatory properties.
Preparation Method
This is one of those homemade beauty products that hardly requires any effort to make. You just need to mix all the ingredients together, and you are good to go. To make things even easier, we suggest you prepare the mix directly in an air-tight container. That way, there will be no confusion about the proportions.
Fill half of the jar with aloe vera gel, and then slowly add the essential oil and the tea tree oil to it. Stir the mixture slightly to ensure all the ingredients are mixed well. You now have the tea tree oil and aloe gel mix ready for use!
Unlike regular aloe vera gel that is used to treat sunburns, this mix is more potent and comes with more benefits. You can use it on the face anytime during the day and also use it as a body lotion if you please.
Mainly, it helps with lines and wrinkles and provides a soothing effect in case your skin is irritated.
5. Shea Butter And Almond Cream
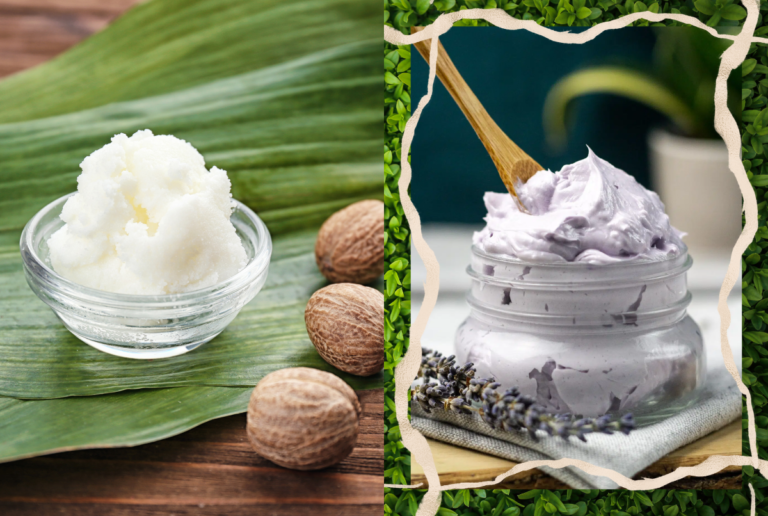
There’s no doubt that masks and scrubs work great to handle skin problems, but you should also add a good moisturizer to your daily skincare routine. And what better than shea butter and almond cream? This moisturizer is suitable for any skin type, and when applied at night, will make your skin soft and supple.
Ingredients List
- Shea butter
- Almond oil
- Coconut oil
- Pure honey
- Vitamin E oil
Just like all the other homemade skin care recipes, we suggest you only use pure and additive-free ingredients. Make sure that the coconut oil you are using is unrefined, and the honey does not contain added sugar and is in its raw form. If you can source local honey, that would be the best.
While coconut oil will keep your skin well moisturized, shea butter and Vitamin E oil will help reduce wrinkles and fine lines.
Preparation Method
Preparing this moisturizer is super simple; all you have to do is follow some easy steps. Pour the melted coconut oil, shea butter, and honey in a bowl and mix all these ingredients slowly. Once you ensure they are blended well, add the Vitamin E oil and almond oil to the mix.
If you do not like the natural scent of the mix, consider adding a few drops of your favorite essential oil. Note that this is not mandatory, and you may skip this step. Finally, transfer the mix to an air-tight container, and you now have a cream that can be used every night before bed.
For the best results, wash your face before bedtime and apply a thin layer of this moisturizer. Be careful, and avoid applying it to areas around your eyes and mouth. You will see excellent results after a few weeks of regular application.
6. Cinnamon And Oatmeal Scrub
Want to get rid of the dead skin on your face so that you can flaunt a clean look? Well, then we suggest you try the exfoliating face scrub made of oatmeal and cinnamon [4]. Add it to your skincare routine, and you will see how it helps tackle excessive facial oils. With regular use, you can surely enjoy clear skin.
Ingredients List
- Dry oats
- Cinnamon powder
If you have acne problems, cinnamon is a magic ingredient that will help you better deal with the situation. Many people have noted that cinnamon powder dries up their pimples. Moreover, it helps bring oxygen to the outer layer of your skin, thereby giving it a glowing and youthful touch.
Oatmeal is a great exfoliator and is suitable even for sensitive skin. However, if you feel that the scrub is too smooth, you can consider adding a little brown sugar to the mix.
Having said that, the ingredients won’t mix well unless you add a liquid component; water is the best. But if you want the scrub to smell refreshing, you can consider adding equal amounts of water and lemon juice.
Preparation Method
Pour the cinnamon powder and dry oats into a small bowl and mix it well before pouring in the liquid.
Start with a few tablespoons of water and keep adding more. This will enable you to stop whenever you feel the consistency of the mixture is right. Keep a consistency that is thick enough to not fall off your face but is not too thick that you cannot scrub properly. Once the scrub is prepared, you can use it on your face.
Pro tip: You can use it as a lip scrub too. After the scrub gently exfoliates your lips, do not forget to apply a lip balm for the best result.
7. Witch Hazel Face Toner
Pores often make your face look dull and increase the chances of experiencing acne. With the witch hazel natural toner, this problem can be effectively tackled, and you can enjoy tight skin with visibly reduced pores. If you use this toner regularly, you’ll notice the concoction helps reduce acne and also shows anti-aging properties.
Ingredients List
- Witch hazel
- Cooled tea
- Essential oils
All the ingredients that we have mentioned above have anti-aging properties and help deal with acne. And all of them are pretty gentle and do not cause any harm to your skin. You will need the liquid (preferably cooled tea) to turn the witch hazel into a toner.
There is no restriction on the kind of tea that you want to use. However, we recommend you stick to using green tea [5] . Before mixing it into the witch hazel, make sure that the tea is totally cooled. Feel free to use any essential oil of your choice to add more benefits and fragrance to the mix.
Preparation Method
To begin making the toner, you will have to start with the tea. Boil green tea in a container, strain it, and let it cool. When you are sure that the tea is not hot anymore, proceed to pour it into a spray bottle and add a good dose of witch hazel drops.
As we have mentioned earlier, though not mandatory, you can add a few essential oils of your choice too. In case you decide on adding essential oils, do not forget to put in a carrier oil as well. Once you have put all the necessary ingredients in the spray bottle, shake it well, and voila! You have the toner ready to be used on your face.
You can spray it directly on your face from the bottle. But do it only after you have washed your face properly. Try to avoid the eye area, nose, and mouth. If you find it difficult to use a spray on the face, pour the toner on a cotton pad and gently dab it all over your face.
Things To Keep In Mind For Homemade Natural Skin Care Recipes
When making DIY beauty products, it is very important that you first identify your skin type. People come with different types of skin, and the products are not a one-size-fits-all solution to your skin problems. Apart from knowing your skin type and the ingredients you are using, it is also important to check how the components in the mix interact with each other.
The other thing to keep in mind when using natural ingredients to make skincare products at home is always to find the right container. This will keep the product safe, and you will be able to use it for a longer period of time. Furthermore, do not depend on guesswork when making your favorite recipes. Get hold of measuring cups, which will ensure that you always put the ingredients in the right proportions.
Another thing that we suggest you do is always make these recipes in small batches. Since it is difficult to understand when these ingredients might expire, it does not make sense to make the mixes in large amounts.
However, if you are making anhydrous products, the chances of contamination are pretty low, and you can make the recipes in large amounts. Pro Tip: Always try to mix antioxidants, such as Vitamin E, or Rosemary extracts to slow the product degradation process.
Final Words
And that’s a wrap, friends!
With the seven best homemade natural skin care recipes up your sleeve, we hope that your skin will glow and emanate a youthful radiance. When making DIY skincare products, ensure that you maintain proper hygiene so that the products remain fresh and last long.
We have put down all the recipes in great detail, and all you have to do is get the right ingredients required to make them. Most of the ingredients can be already found in the house, and for the others, you will have to visit the local supermarket. Do not stop at just making the product, but ensure that you apply it regularly to see the best results.
Until next time, take care!
References:
1. https://www.ncbi.nlm.nih.gov/pmc/articles/PMC6335493/
2. https://www.ncbi.nlm.nih.gov/pmc/articles/PMC5661189/
3. https://pubmed.ncbi.nlm.nih.gov/22998411/


